3 or 6 Month Timeline? Wedding Planning Checklist That Adapts

3 or 6 Month Timeline? Wedding Planning Checklist That Adapts
Start your wedding planning checklist by locking in your budget and guest count before anything else, since both numbers drive every venue and vendor decision that follows. From there, work a phase-based checklist: 12+ months out for venue and photographer, 8 to 6 months for attire and save-the-dates, 5 to 3 months for invitations and seating, and the final stretch for legal paperwork and confirmations. Grab the printable version below, and if your engagement is shorter, skip ahead to the 6-month or 3-month adjustments.
TL;DR:
- Setting your guest count before booking venues or vendors is crucial, as it directly affects pricing, capacity, and overall planning.
- Booking key vendors like your venue and photographer should happen 12 to 18 months in advance, especially for popular dates in spring and fall.
- Sending save-the-dates and booking attire should be completed 8 to 6 months before, especially for destination weddings needing earlier notices for guests.
- Finalizing invitations, seating arrangements, and vendor confirmations occurs 5 to 3 months out, with enough lead time for printing and response tracking.
- The last two months focus on legal paperwork, final payments, and rehearsals, requiring diligent confirmation of all details a few weeks before the wedding day.
Table of Contents
- The Printable Wedding Planning Checklist (And How to Use It)
- 12 to 9 Months Out: Budget, Venue, and the Big Bookings
- 8 to 6 Months Out: Attire, Save-the-Dates, and Vendor Confirmations
- 5 to 3 Months Out: Invitations, Seating, and Paper Goods
- The Final 2 Months: Legal Paperwork, Payments, and the Rehearsal
- Your Wedding Day, Hour by Hour
- Turning the Checklist Into a Real, Shared Plan
- Guest Accommodations and Travel: What to Sort Out Early
- Planning the Rehearsal and Rehearsal Dinner
- Author perspective: pace yourself, protect your calendar
- Try Jubiliq: One Place for Your Whole Wedding Checklist
- Where This Checklist Comes From
- Sources
- FAQ
The Printable Wedding Planning Checklist (And How to Use It)
You need two versions of this checklist, not one. A single-page quick list works for a glance on your phone during a lunch break. A full month-by-month template, built in Google Sheets or downloaded as a PDF, is where the real tracking happens.
Here’s the split:
- One-page quick checklist — the 15 to 20 biggest milestones (book venue, order dress, send invitations, get marriage license) with no sub-tasks. Print it and stick it on the fridge.
- Full timeline template — every task broken out by month, with columns for vendor name, deposit paid, balance due, and contact info. This is the version you actually work from week to week.
Before you fill either one out, customize it:
- Enter your real guest count first. It changes almost every downstream number, from catering minimums to how many save-the-dates you order.
- Cross out anything that doesn’t apply. No rehearsal dinner? No welcome bags? Delete the row. A checklist cluttered with tasks you’re skipping is worse than no checklist.
- If you’re planning a destination wedding, shift your save-the-date and vendor-booking dates earlier. Guests need more lead time to book flights and request time off work.
Once it’s customized, share it. Print a couple of copies for your partner or parents, email a PDF to your planner, or move the whole thing into a shared Google Sheet so multiple people can update it live without six versions floating around in group texts.
12 to 9 Months Out: Budget, Venue, and the Big Bookings
This phase sets the shape of your entire wedding, and skipping steps here creates problems you can’t fix later. Everything traces back to two numbers: your total budget and your guest count. Set both before you tour a single venue, because per-person catering costs and room capacity limits will eliminate options fast once you have a real number in front of you.
With those numbers settled, move on to:
- Book your venue and photographer. In competitive markets, both get reserved 12 to 18 months ahead for popular dates, especially spring and fall Saturdays.
- Build in a contingency fund. Set aside 5 to 15% of your total budget for the fees, upgrades, and surprises that show up later.
- Decide on a planner or day-of coordinator. If you’re working full time and planning a wedding of more than 100 guests, this is usually where the stress starts to compound without one.
- Open a hotel block if you have out-of-town guests, and start your wedding website so people have somewhere to check details as they firm up.
- Start a vendor shortlist. Florists, caterers, and bands with strong reputations also book out fast, even if you’re not ready to sign contracts yet.
Pro Tip: Before you write a single date on your timeline, block out every weekend you already know you’re unavailable, work trips, family events, other weddings, so you’re not accidentally scheduling a cake tasting the same week as a work conference.
8 to 6 Months Out: Attire, Save-the-Dates, and Vendor Confirmations
This is the stretch where your wedding starts feeling real, mostly because you’re now shopping for the dress and locking in the people who’ll show up on the day. Order your gown and suit with enough lead time to accommodate designer delivery and alterations.

Send your save-the-dates during this window, and include hotel or travel info if a meaningful chunk of your guest list lives out of town. For a destination wedding, send them closer to 14 months out rather than 8; couples who wait until 8 months frequently regret not giving guests more runway to book flights or request vacation days.
Other tasks that belong in this window:
- Schedule dress fittings and suit alterations, leaving at least six to eight weeks before the wedding for a final fitting.
- Start menu tastings with your caterer and begin nailing down décor and florals.
- Book any major vendor you haven’t confirmed yet, florist, baker, live band or DJ, since the good ones fill their calendars from the top down.
- Sort out permits if you’re hosting anywhere public, plus transportation quotes for the wedding party and guest shuttles.
- Get rental quotes locked in for tables, chairs, linens, or a tent if your venue doesn’t supply them.
5 to 3 Months Out: Invitations, Seating, and Paper Goods
Invitations go out roughly 6 to 8 weeks before the wedding, but the prep work, addressing envelopes, setting up an RSVP system, proofing the print, starts well before that. Give yourself the full 5 to 3 month window to get this right, because a late invitation batch has a way of compressing every deadline behind it.
Set up your RSVP tracking now, whether that’s a spreadsheet, a wedding website form, or an event platform that logs responses automatically. Chasing down stragglers by phone in the final two weeks is a miserable use of your time, and it’s avoidable if you build in a hard RSVP deadline with a few days of buffer before your final head count is due.
This phase also covers:
- Draft a seating chart framework, even a loose one, so you’re not building it from scratch under pressure later.
- Start place cards, programs, and menu cards, or order them from a printer with enough lead time for a proof round.
- Finalize your menu and put in orders for rentals, signage, and any custom décor pieces.
- Confirm timelines with every vendor who’s already booked, arrival times, setup windows, and how long they need for breakdown.
- Put together welcome bags and finalize any guest activities if you’ve got a multi-day wedding weekend planned.
The Final 2 Months: Legal Paperwork, Payments, and the Rehearsal
The last stretch is less about big decisions and more about closing loops. Miss one here and it tends to surface at the worst possible moment, usually the morning of.
- Get your marriage license. Timing rules vary widely by state and country, and some jurisdictions require a waiting period after you apply, so check your local requirements now rather than the week before.
- Gather required IDs for both of you and anyone standing in as a witness, if your jurisdiction requires one.
- Confirm your final head count and send it to your caterer, then pay whatever vendor balances are due. Most contracts require final payment 2 to 4 weeks out.
- Build a vendor contact sheet with every phone number, arrival time, and confirmation number in one place, and print copies for your coordinator, parents, and wedding party.
- Run the rehearsal, and use it to walk your officiant, wedding party, and readers through the actual ceremony order.
- Pack your wedding-day bag: rings, vows, any paperwork you still need, a phone charger, and a change of shoes.
Pro Tip: Assign one trusted, non-wedding-party person, a sibling, a close friend, as your point of contact for vendors on the day. You want zero vendor questions reaching you or your partner once you’re getting ready.
Your Wedding Day, Hour by Hour
A printed “day sheet,” the kind you hand to every vendor and your point people, is what keeps a wedding day from turning into a scramble. It should map roughly like this:
- Morning: hair, makeup, and getting dressed, with a buffer built in for delays.
- Midday: first look or first-look photos, followed by ceremony.
- Early afternoon: formal photos and cocktail hour.
- Evening: reception entrance, dinner, toasts, first dance, and open dancing.
- Late evening: cake cutting, bouquet toss if you’re doing one, and send-off.
Beyond the hourly flow, designate specific people for specific jobs: one person handles vendor questions, one watches the gift table, one carries final payments and tips in envelopes labeled by vendor.
Your physical checklist for the morning of:
- Rings, vows, and any paperwork still outstanding
- Vendor payment envelopes and tips
- A small emergency kit: safety pins, stain remover, bobby pins, pain reliever
- A comfortable change of shoes for the reception
Eat something before the ceremony and keep water nearby all day. Couples skip both far more often than you’d expect, and a hungry, dehydrated bride at hour six of a reception is not a fun surprise.
Turning the Checklist Into a Real, Shared Plan
A paper checklist tells you what to do. It doesn’t tell your florist their balance is due, or update your maid of honor when three more guests RSVP “no.” That gap is exactly where things fall through, and it’s where a tool like Jubiliq earns its place in the process.
An adaptive event planning interface reshapes itself around a wedding specifically, hiding options like sponsorship and ticketing fields that a corporate event or gala would need. A typical workflow looks like this: import your guest list, assign RSVP statuses as responses come in, attach vendor contracts and payment schedules, then publish a printable day sheet your coordinator and vendors can follow without calling you.
Pro Tip: Set automatic reminders for vendor deposit due dates inside the platform. It removes the mental math of tracking six different payment schedules in your head.
The gap between a checklist and a working plan is usually just visibility, who owes what, who confirmed, who’s still a maybe. Closing that gap is what turns a spreadsheet into an actual system.
Guest Accommodations and Travel: What to Sort Out Early
Guests need answers about where to stay well before they need to know what’s on the menu. If a meaningful share of your list is traveling in, open a hotel room block as soon as your venue and date are confirmed, ideally in the 12 to 9 month window alongside your other big bookings.
For destination weddings specifically, negotiate that block at a discount of 15 to 20% below the hotel’s published rate, and plan your guest list assuming roughly 15% of invitees decline. That cushion keeps your numbers realistic instead of scrambling to fill a block that’s too big or apologizing for one that’s too small.
Beyond the block itself:
- List two or three hotel options at different price points on your wedding website, not just the closest one to the venue.
- Include transportation details: is there a shuttle from the hotel, or are guests driving and parking themselves?
- For a multi-day wedding weekend, give guests a loose itinerary early so they can plan flights around welcome events and brunches, not just the ceremony.
- If guests are flying internationally or across states, mention any visa, passport, or ID requirements on your website rather than leaving it as a group-text conversation later.
The earlier guests have this information, the fewer flight-booking scrambles you’ll field two months out.
Planning the Rehearsal and Rehearsal Dinner
The rehearsal itself usually happens the evening before the wedding, though some couples run it two days out if the wedding party is traveling from far away. Its only real job is making sure everyone knows where to stand, when to walk, and what happens if something goes off script, so keep it under an hour if you can.
Walk through the full ceremony order with your officiant, wedding party, readers, and anyone handling programs or rings. If your ceremony includes anything unusual, a unity ritual, a language switch, a surprise element, this is the moment to rehearse it out loud rather than hoping it goes smoothly live.
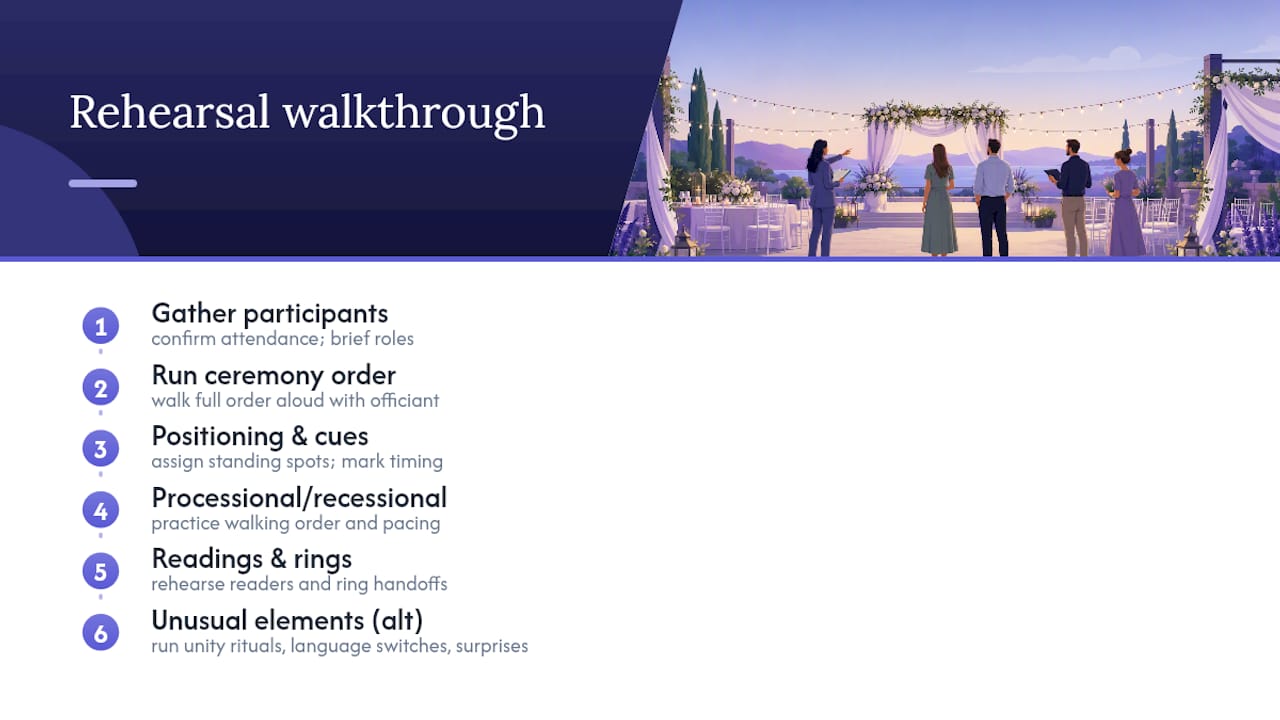
The rehearsal dinner that follows is smaller and lower stakes than the wedding itself, but it still needs a headcount and a venue booked weeks ahead, not days. Traditionally it’s kept to immediate family and the wedding party, though plenty of couples now open it to all out-of-town guests since they’re already in town a day early anyway. Either way, confirm the guest list for this dinner separately from your main RSVP count, since it’s rarely the same number.

Use the dinner to hand out any thank-you gifts to your wedding party, since it’s a calmer setting than the reception where you’ll have five minutes to yourself all night.
Author perspective: pace yourself, protect your calendar
Here’s what most timelines leave out: the schedule only works if you block off the weekends you’re already unavailable before you start assigning deadlines to anything else. A generic 12-month timeline assumes you have zero other obligations, which is never true.
Treat every checklist, including this one, as a draft you’re allowed to edit. Reorder tasks to fit your actual life, not the calendar a magazine printed. And delegate early: hand off vendor calls to a parent or your maid of honor, and let a tracking tool carry the mental load you’d otherwise be holding alone.
— HCRF
Try Jubiliq: One Place for Your Whole Wedding Checklist
Every task on this checklist, budget tracking, vendor contracts, RSVPs, the final day sheet, tends to live in five different apps and a stack of sticky notes. This platform is built to hold all of it in one adaptive interface that reshapes itself for a wedding specifically, so you’re never digging through corporate-event fields you don’t need.
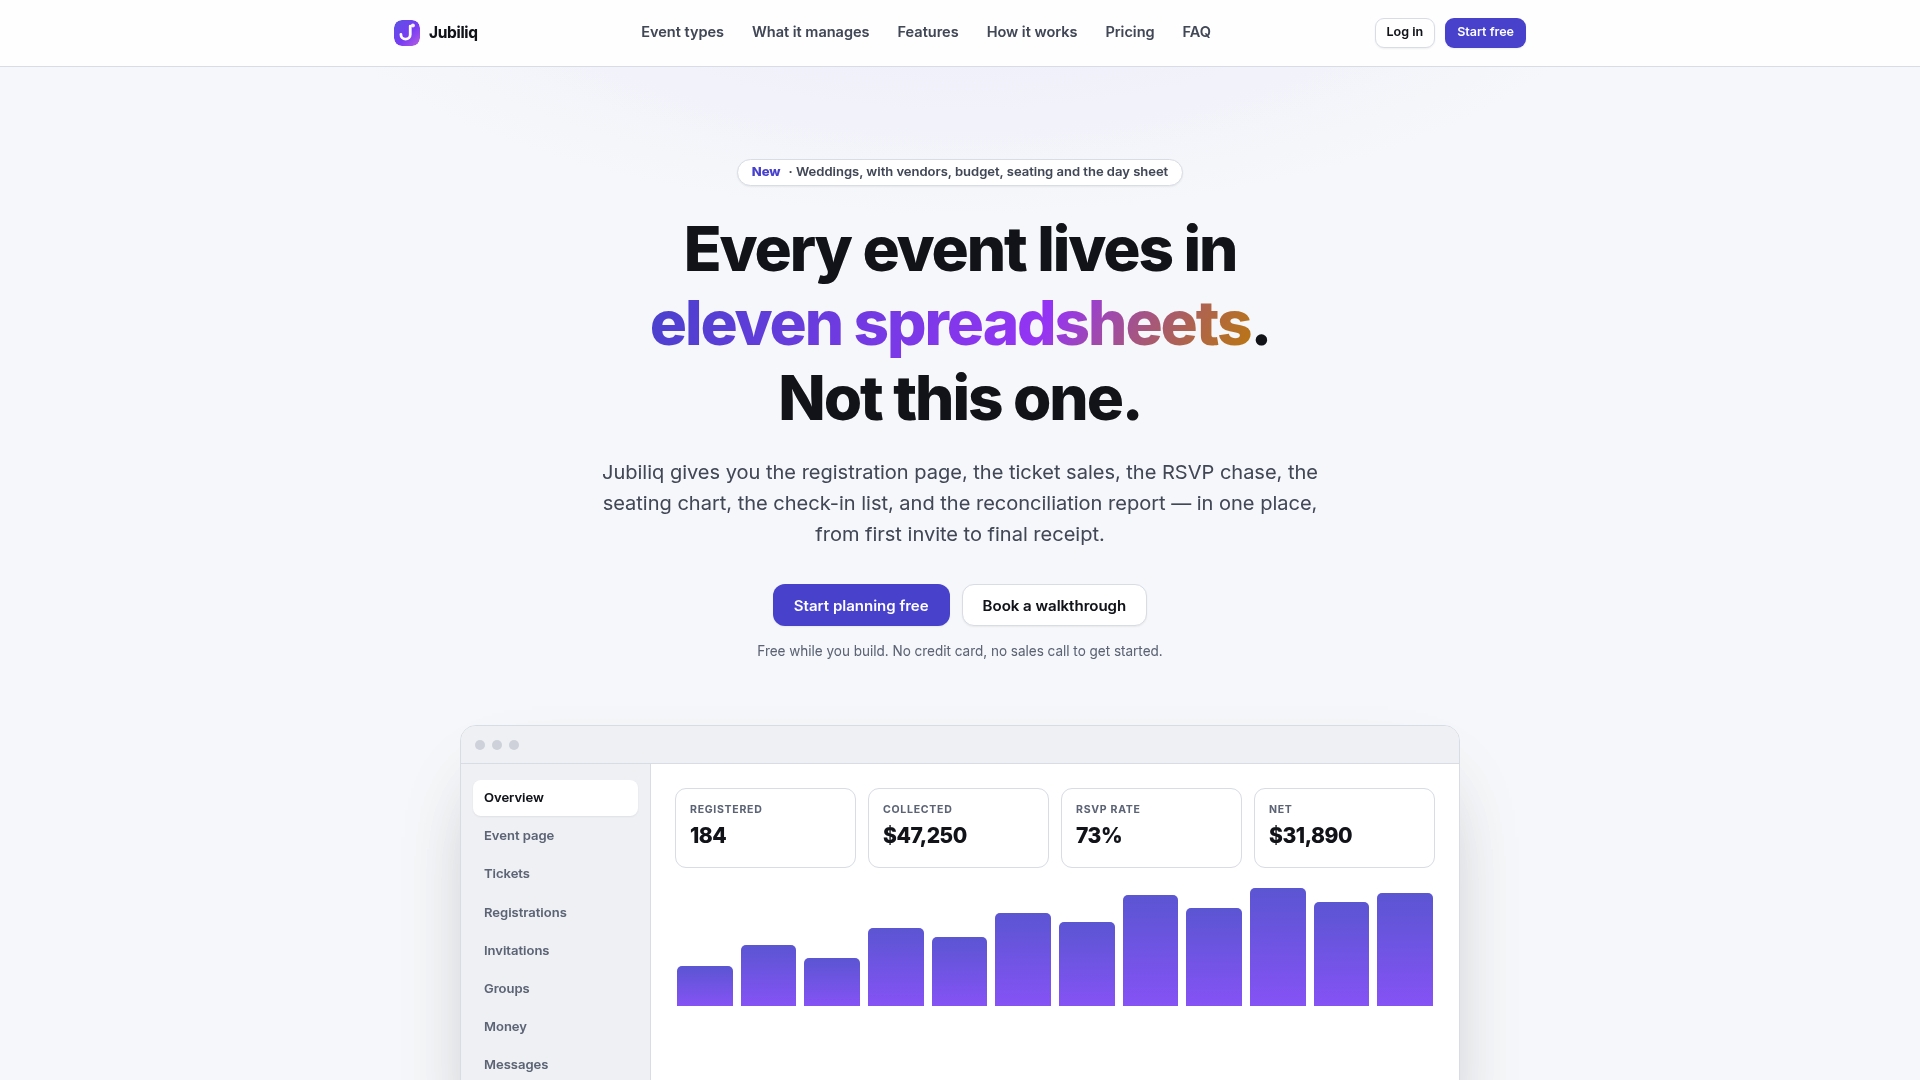
Import your guest list and the platform tracks RSVP status automatically as responses roll in. Attach vendor contracts and payment due dates to your budget ledger so nothing gets missed in the final two months. When the big day arrives, publish a printable day sheet straight from the platform and hand it to your coordinator, no re-typing the timeline into a fresh document the week of. If you want to see how the phases in this checklist map onto a real, shareable workflow, start planning with Jubiliq and set up your first guest list today.
Where This Checklist Comes From
The timeline structure here draws on planning frameworks from several established wedding resources. Aisle’s 36-milestone planning timeline informs the 12 to 18 month vendor booking window and the destination wedding adjustments. Brides’ wedding checklist and timeline guide shaped the month-by-month, bite-sized task approach used throughout. The flexibility guidance, blocking out unavailable time and reordering tasks as needed, comes from A Practical Wedding’s 12-month timeline.
For the downloadable template format itself, including columns for vendor deposits and balances, Bliss & Bone’s free wedding planning checklist and template is a solid starting point to customize for your own guest count and budget.
Sources
- Wedding Planning Timeline: Free, 36 Milestones · Aisle
- The Ultimate Wedding-Planning Checklist and Timeline · Brides
- Your Complete Wedding Planning Timeline | A Practical Wedding
- Wedding Planning Checklist — Free Template & Timeline · Bliss & Bone
FAQ
What should be included in a wedding planning checklist?
A complete checklist covers budget and guest count, venue and vendor bookings, attire and fittings, invitations and RSVP tracking, legal paperwork like your marriage license, final vendor payments, and a day-of timeline with a vendor contact sheet.
What is the order of planning a wedding?
Start with budget and guest count, then book your venue and photographer, followed by attire and save-the-dates, invitations and seating, and finish with legal paperwork, final payments, and the rehearsal in the last two months.
How do I adjust this checklist for a 6-month engagement?
Compress the 12 to 9 month and 8 to 6 month phases into the first two months, prioritizing venue, photographer, and attire immediately since those have the longest vendor lead times.
What if I only have 3 months to plan?
Book your venue and key vendors in week one, order attire off the rack rather than custom, and send invitations within the first two weeks so RSVPs still have time to come in before your final head count is due.
When should I send wedding invitations?
Send invitations 6 to 8 weeks before the wedding for a local guest list, but move that earlier if a large share of guests are traveling, since they’ll need more notice to arrange flights and time off.
How can a planning tool like Jubiliq help with my checklist?
Jubiliq consolidates RSVP tracking, budget management, vendor contracts, and a printable day sheet into one adaptive interface, so you’re not managing the checklist across five separate spreadsheets and apps.